Alright, let’s not pretend scones are easy. They should be — six ingredients, no fancy gear, barely any time in the oven — and yet, they’ve humbled me more than puff pastry and soufflés combined. I’ve baked scones so dense they could anchor a small boat. Others were dry enough to exfoliate with.
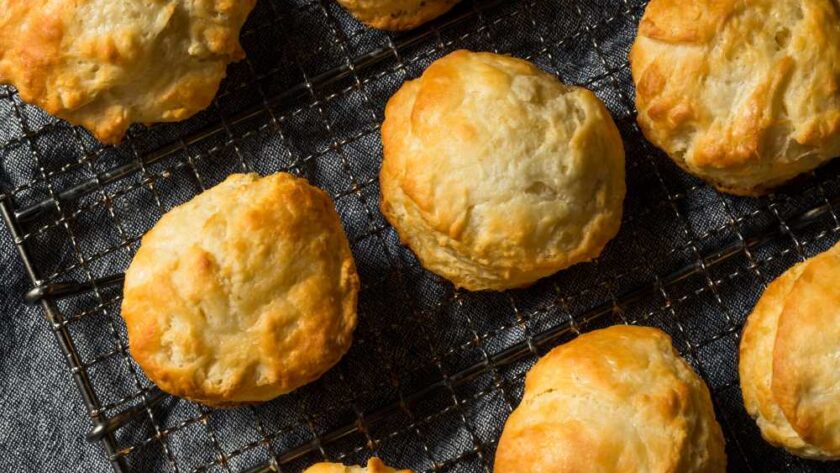
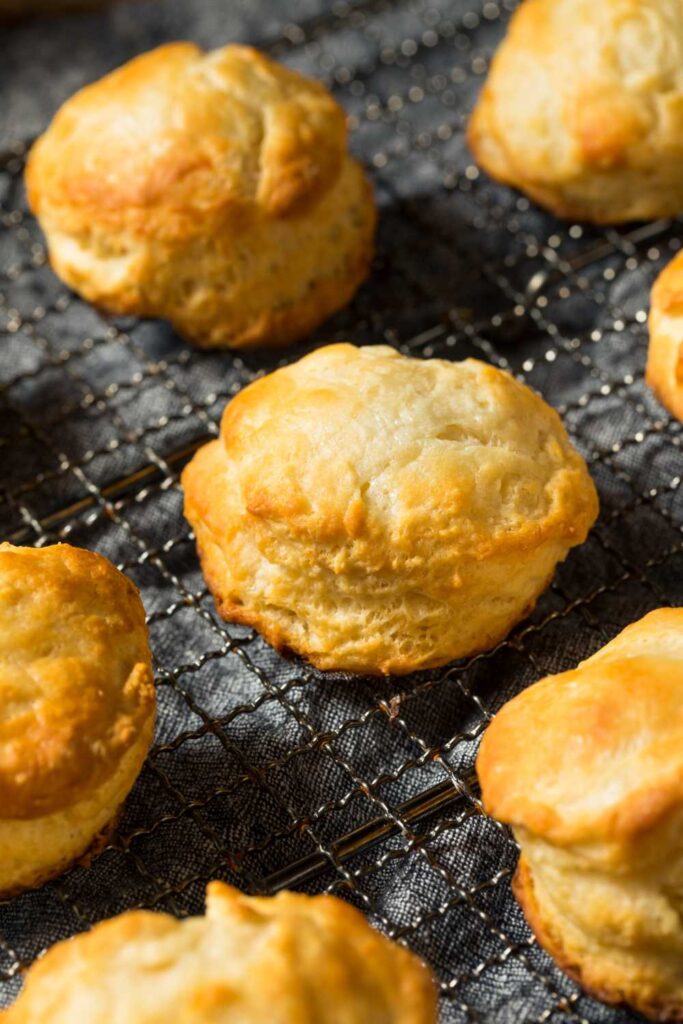
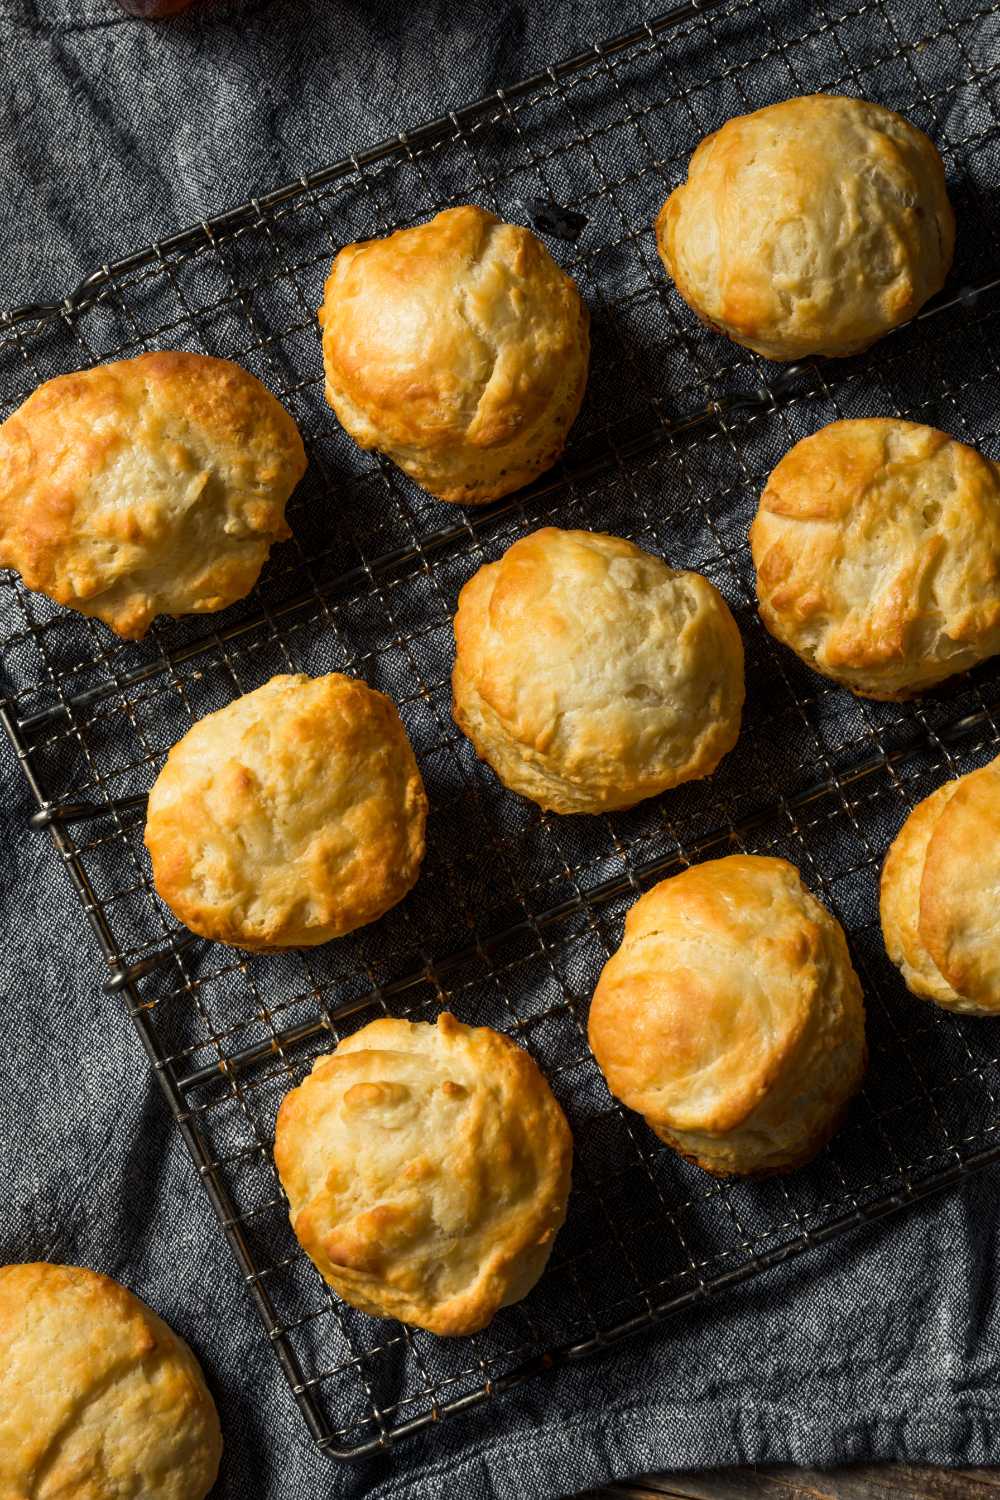
But here’s the thing: when you stop playing experimental jazz in your kitchen and just follow Mary Berry’s buttermilk scones recipe like a normal, rational person — they actually turn out. I’m talking: soft, tall, golden-topped beauties. The kind your gran would tear open with her fingers and nod approvingly over. The buttermilk gives them tenderness, the self-raising flour gives them rise, and the butter — cold, always cold — gives them that classic short, crumbly texture.
So if you’re tired of serving baked shame, let’s get it right this time. No substitutions. No olive oil. (Yes, I tried. No, I don’t want to talk about it.)
Ingredients List
- 3 ½ cups self-raising flour — This is your lift. Use fresh flour; old flour = sad, flat scones.
- 2 tbsp caster sugar — Just a light touch of sweetness. Don’t go cupcake mode.
- 60g cold butter, chopped — I cube it straight from the fridge. Cold = flaky. Warm = chewy mess.
- 1 ½ cups buttermilk — For that tangy softness. No, yogurt’s not the same. Trust me.
- Pinch of salt
- Jam, to serve
- Whipped cream or clotted cream, to serve
I don’t say anything about the jam and cream. They speak for themselves.
How To Make It (Instructions)
- Preheat your oven to 220°C (200°C fan). Grease or flour a 19cm square tin.
- Mix dry ingredients in a large bowl — flour, sugar, salt.
- Rub in the butter using cold fingertips until it looks like fine crumbs.
- If your hands run warm, chill them or pop the bowl in the fridge for a bit.
- Make a well in the middle and pour in your buttermilk.
- Stir with a flat knife, just until it starts coming together. Shaggy is good. Wet is fine. Neat is bad.
- Tip onto a floured surface and gently bring it together. Don’t knead like bread — a few presses, that’s it.
- Pat into a round about 3cm thick.
- Cut out scones with a 5cm floured cutter. Press straight down — no twisting!
- Re-roll gently and cut more. You should get 14–16 total.
- Place close together in your tin — they help each other rise when snuggled.
- Bake 15–17 minutes until golden and hollow when tapped underneath.
- Serve warm with jam and cream. And if you don’t make tea with it, we can’t be friends.
Don’t forget to put the kettle on. It’s illegal to eat a scone without tea. Probably.
Common Mistakes
Why are my scones tough?
You kneaded too much. This dough needs a gentle touch — think more “cloud patting” than “bread wrestling.”
Why didn’t they rise?
Stale flour or a cold oven. Scones are impatient little beasts — get that heat up early.
Can I use plain flour?
Yes, but add 2 tsp baking powder per cup to mimic self-raising flour.
Why are my scones dry?
Probably added too much flour while shaping, or didn’t use enough buttermilk.
My personal disaster?
Used olive oil once. Thought I was being “Mediterranean chic.” Ended up with scone-shaped focaccia. It haunts me.
Storage And Reheating Tips
Room Temp:
Airtight tin, up to 2 days. Best eaten fresh, ideally with messy fingers and hot tea.
Fridge:
Avoid it — turns them dry and sad.
Freezer:
Wrap well and freeze up to 3 months. Reheat from frozen, no need to thaw.
To Reheat:
- Toaster Oven: 3–5 minutes, crisp outside, soft middle.
- Oven: 180°C wrapped in foil, 5–10 mins.
- Microwave: Wrapped in damp kitchen towel, 20–30 seconds.
What To Serve With It
- Clotted Cream + Strawberry Jam — Iconic. Non-negotiable.
- Lemon Curd — Adds tart richness that plays nicely with the buttermilk.
- Earl Grey Tea — The floral notes balance the richness. (Bonus points if served in a proper cup, saucer and all.)
Feeling cheeky? Pair these with soft scrambled eggs and smoked salmon for a bougie brunch that’ll make your guests gasp. In a good way.
FAQ Section
Can I make these gluten-free?
Yes. Use gluten-free self-raising flour and add ½ tsp xanthan gum for texture.
Can I freeze the unbaked scones?
Absolutely. Cut them, freeze them on a tray, then bag. Bake from frozen — add 3–5 minutes to the time.
Do I need a round cutter?
Not at all. Use a knife and cut into triangles for a rustic look. Just don’t squash the edges.
Can I make them sweeter?
Sure. Add a tablespoon more sugar or a handful of sultanas. But don’t let it turn into a muffin.
Try More Recipe:

Mary Berry Buttermilk Scones
Description
Light, fluffy scones with a tangy buttermilk twist — perfect for afternoon tea with jam and cream.
Ingredients
Instructions
- Preheat oven to 220°C (200°C fan). Grease or line a 19cm square tin.
- Combine flour, sugar, and salt in a bowl.
- Rub in cold butter until crumb-like.
- Pour in buttermilk and mix gently with a flat-bladed knife.
- Turn onto floured surface and lightly knead. Pat to 3cm thick.
- Cut scones with a 5cm floured cutter, pressing straight down.
- Place close together in tin.
- Bake for 15–17 minutes until golden and hollow-sounding.
- Serve warm with jam and cream.