The first time I made chili jam, I didn’t fully understand what it was. A jam… but spicy? Was it meant for toast? (Spoiler: no, but also… kind of yes?) All I knew was that Nigella had that sparkle in her eye when she stirred it, and that was enough for me. I gave it a go on a quiet Sunday, and by the end of the afternoon, I had six little jars of red fire-gloss sitting proudly on the counter. I didn’t shut up about them for a week.
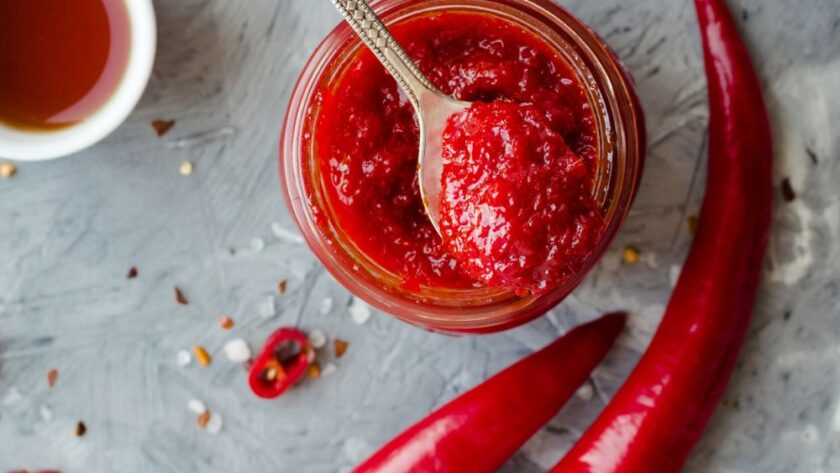
This jam is a mood-lifter. It’s got heat, sweetness, tang, and a whole lot of personality. It’s just as happy dolloped on grilled cheese as it is brushed onto roasted sausages. It keeps for ages, makes a brilliant edible gift, and turns any boring fridge dinner into something bold. Plus, it looks stunning — all those red flecks suspended in ruby jelly. Like edible stained glass.
Why You’ll Love It
- Only four ingredients. Yep. That’s it. And you probably already have them.
- Quick to prep, lasts for ages. Make one batch and you’re sorted for months.
- Perfect for cheese boards. Especially with mature cheddar or crumbly blue.
- Customisable heat. Take out more seeds for milder, or leave a few in for drama.
- Stunning colour. Looks like something you’d pay £7 a jar for at a fancy deli.
- Brilliant on EVERYTHING. Sandwiches, pizza, roast veg, pork chops — go wild.
Ingredients
- 150g long red chili peppers (deseeded and chopped into chunks)
- 150g red bell peppers (cored and chopped roughly)
- 1kg jam sugar (yes, jam sugar — not regular sugar)
- 600ml cider vinegar
How to Make It
Blitz the peppers into a bright red rubble:
Throw your chili peppers and red peppers into a food processor and pulse until finely chopped. You want them almost minced, but still with some texture. It’ll look like red confetti — perfect.
Gently melt the sugar:
In a big, wide pan, combine the cider vinegar and jam sugar. Set it over low heat and stir occasionally until the sugar has fully dissolved. It takes a minute, but don’t rush this bit or it’ll go grainy.
Stir in the pepper mix:
Once the sugar’s melted, scrape in your chili-pepper mixture. Stir gently — the whole thing should now smell spicy-sweet and slightly tangy. (This is the moment people walk into the kitchen and say, “What’s that amazing smell?”)
Crank the heat and boil:
Turn the heat up and let the jam boil for 10 full minutes. It should bubble like mad and thicken slightly. Keep an eye on it — it can foam up quickly. Don’t leave the room. This is the drama moment.
Let it cool and thicken:
Take the pan off the heat and leave it for about 40 minutes. As it cools, it’ll shift from syrupy to jammy. Give it a stir halfway through if the chili flecks start floating weirdly. They’ll settle in the end.
Jar it up and admire yourself:
Spoon the chili jam into sterilised jars (warm and dry, not straight from the dishwasher). Seal tightly. It’ll keep for ages, and look like you know what you’re doing in the kitchen — because you do.

Common Mistakes and How to Dodge Them
Why isn’t my jam thickening?
You probably didn’t boil it long enough, or the heat was too low. Use a wide pan for even bubbling, and set a timer for that 10-minute boil.
Can I use regular sugar instead of jam sugar?
Not for this one, sadly. Jam sugar contains pectin, which is what helps it set. Regular sugar won’t cut it.
My chili bits are all floating.
That’s normal at first. Give it a gentle stir as it cools, and once it thickens up a bit, they’ll stay suspended.
Why does it taste too vinegary?
It mellows out as it sits. Wait a day or two before judging too harshly. It settles into itself.
Storage and Reheating
Fridge:
Once opened, keep your jar in the fridge. Lasts a good 3–4 weeks, maybe more if you’re careful with clean spoons.
Freezer:
You can freeze chili jam! Pour into freezer-safe containers or silicone molds. Just defrost in the fridge before using.
To reheat (if needed):
Pour some into a small pan and warm gently over low heat to loosen it. Or microwave in short bursts, stirring between.
Frequently Asked Questions
Can I make this jam spicier?
Absolutely. Leave in some chili seeds, or use hotter varieties like bird’s eye or Scotch bonnets (carefully!).
What can I eat it with?
Grilled cheese, fried eggs, sausages, roast veggies, burgers, or just on crackers with cream cheese. It’s wildly versatile.
Do I need to sterilise the jars?
Yes, if you want it to keep. Just wash in hot soapy water, rinse, then dry in a low oven (about 140°C) for 20 minutes.
Can I double the recipe?
You can, but do it in two batches if you can — it’s easier to control the boil and setting that way.
Nutrition Facts (Per Serving):
- Calories: 100
- Fat: 0g
- Carbs: 23g
- Sugar: 20g
- Protein: 1g
- Sodium: 55mg
Try More Nigella Recipes:


Nigella Chili Jam
Description
A fiery-sweet chili jam made with just four ingredients — red peppers, chilies, jam sugar, and cider vinegar — this glossy condiment is bold, beautiful, and brilliant on everything.
Ingredients
Instructions
- Pulse peppers and chilies in a food processor until finely chopped.
- In a wide pan, gently dissolve jam sugar in cider vinegar.
- Add pepper mixture and bring to a hard boil for 10 minutes.
- Remove from heat and cool for 40 minutes, stirring if needed.
- Spoon into sterilised jars and seal tightly.
Notes
- Don’t skip the jam sugar — it’s key for setting.
- Use a wide pan so the jam cooks evenly and thickens properly.
- Sterilise jars properly to extend shelf life.
- Store unopened jars in a cool place. Refrigerate after opening.