There’s something wildly nostalgic about cherry pie, isn’t there? It’s one of those desserts that feels like it belongs in a countryside window, cooling on a wire rack while someone inside brews a pot of tea and hums along to the radio. The smell alone — warm cherries, buttery crust, and a hint of almonds — is enough to stop you mid-task and drift off into pie-related daydreams.
The first time I made this Mary Berry cherry pie, I was half convinced I’d made a mess of it. The dough looked too soft, the cherries too juicy, and don’t get me started on the moment I tried to grate chilled dough. But listen — it came out of the oven golden, bubbling, and absolutely gorgeous. Sweet, tart, buttery… and not a crumb left by the end of the evening.
Why You’ll Love It
- The crust has ground almonds, which makes it slightly nutty and extra moreish.
- You don’t need any fancy techniques — just hands, a bowl, and a love of pie.
- You can use fresh or frozen cherries, depending on the season (and your patience).
- Great for gatherings, Sunday lunch, or sneaky slices at midnight.
- That grated dough top? Looks rustic and impressive with zero stress.
- You can make it ahead and it reheats like a dream.
Ingredients
For the dough:
- 250g plain flour
- 50g ground almonds
- 175g unsalted butter, chilled and diced
- 100g caster sugar
- 2 large free-range egg yolks
- 3 tbsp single, whipping, or double cream
- 1 tbsp icy water
For the filling:
- 600g cherries, pitted
- 2 tsp caster sugar
- 1 tsp cornflour
- Icing sugar (for dusting)
How to Make It
Get your dough sorted:
Pop the flour, ground almonds, diced butter, and sugar into a food processor (or do it by hand if you’re feeling rustic). Pulse until it looks like fine crumbs. In a separate cup, whisk together the egg yolks, cream, and icy water. Pour into the flour mix and pulse again until it comes together into a soft dough.
Chill out:
Wrap the dough in cling film and let it rest in the fridge for about 30 minutes. Trust me — don’t skip this. It helps firm it up and makes it so much easier to handle.
Make the cherry magic:
Mix your pitted cherries in a bowl with the sugar and cornflour. That cornflour will help the juices thicken in the oven so you don’t end up with cherry soup.
Build your base:
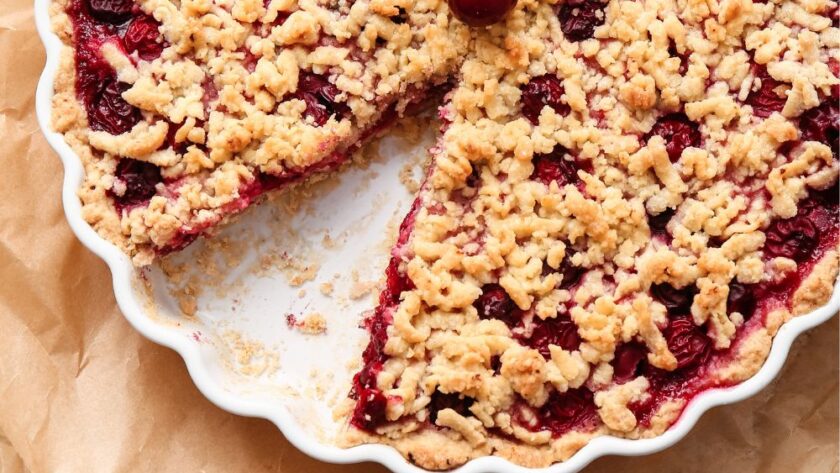
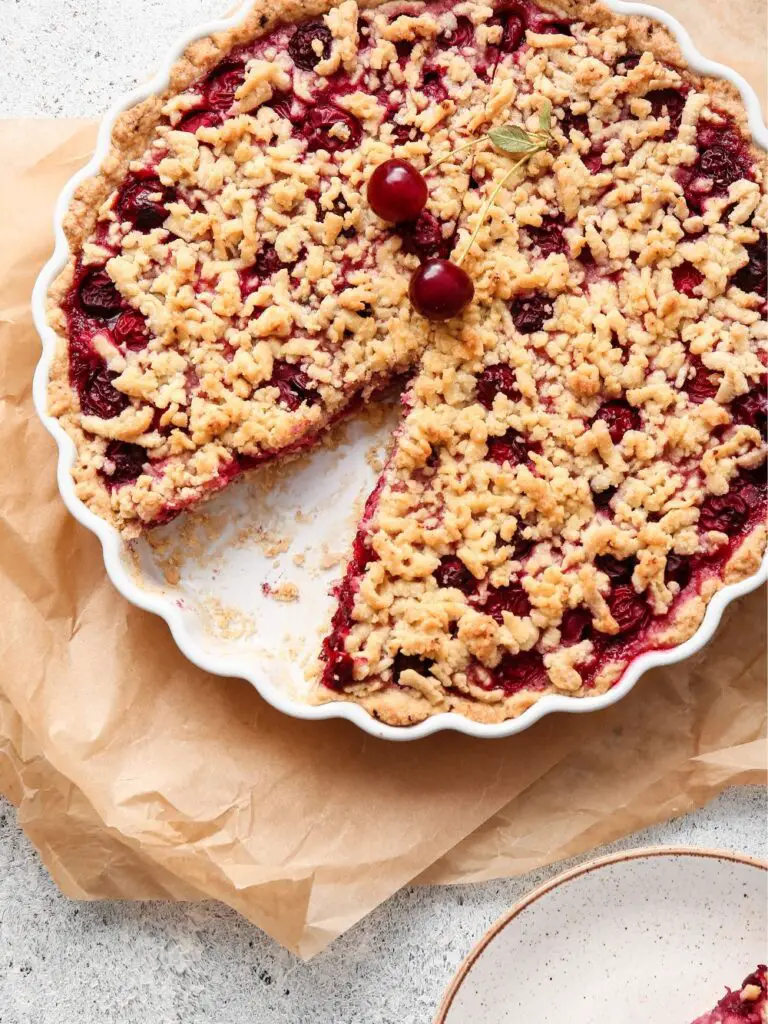
Take half the chilled dough and grate it coarsely (yes, really — just like cheese). Scatter it into a greased pie dish and press it gently into place with floured fingers. You want a 5mm-ish thickness across the bottom and up the sides.
Fill it up:
Tip in your cherry mixture and spread it evenly. Juices and all. We’re not being precious here.
Add your rustic top:
Take the other half of the dough, grate it again (I know it’s weird, but it totally works), and scatter it loosely over the cherries. Don’t press it down — let it stay craggy and uneven. That’s the charm.
Bake to golden perfection:
Slide your pie dish onto a preheated baking sheet in a 180°C (350°F) oven. Bake for 45–50 minutes until the top is golden and the fruit is bubbling up around the edges.
Cool just a little:
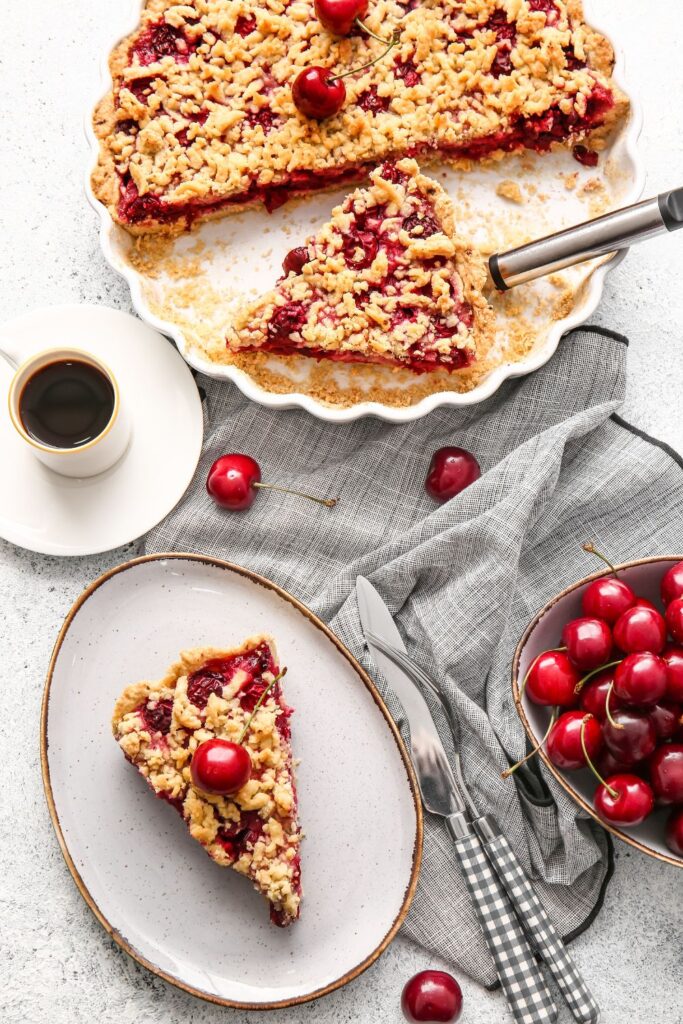
Let it sit for 10–15 minutes before digging in. The filling needs a minute to set, and hot cherry juice is not a friend to your tongue.
Common Mistakes and How to Dodge Them
My dough was too sticky to grate.
Pop it in the freezer for 10–15 minutes to firm it up a bit. Just don’t forget it in there.
The bottom crust was soggy.
Preheat your baking sheet — it helps cook the base evenly from underneath.
Too runny?
Make sure your cornflour is mixed well with the cherries. You can bump it up to 1.5 tsp if your cherries are extra juicy.
Cherry skins too chewy?
You can briefly cook the filling before baking, but honestly, it’s usually fine — and the texture gives it a bit of bite.
Storage and Reheating
Fridge:
Cover with foil or wrap well — keeps nicely in the fridge for 4–5 days.
Freezer:
Wrap individual slices in plastic wrap and foil. Freeze for up to 4 months. Thaw in the fridge overnight.
To reheat:
- Oven: Best option — 350°F for 15–20 minutes.
- Microwave: Quick fix — 30-second bursts. The crust softens, but it’s still tasty.
Frequently Asked Questions
Can I use frozen cherries?
Absolutely — just defrost and drain them well first.
What if I don’t have ground almonds?
Use more flour in its place — but the almonds do add a gorgeous flavour and crumb.
Can I use a pie crust instead of grated dough?
You can! Roll out the base and either do a lattice or full top. But the grated crust is fun and much easier than it sounds.
How do I stop the filling from bubbling over?
Place the pie dish on a baking tray lined with parchment. That way, if it oozes, you’re not scrubbing the oven later.
Nutrition Facts (Per Serving):
- Calories: 486
- Fat: 22g
- Saturated Fat: 5.4g
- Carbohydrates: 69g
- Protein: 5g
- Sugar: 33g
- Sodium: 344mg
Try More Mary Berry Recipes:
- Mary Berry Lemon And Elderflower Cake
- Mary Berry Lemon Drizzle Muffins
- Mary Berry Lemon Curd Muffins

Mary Berry Cherry Pie
Description
A classic British cherry pie with a buttery almond crust and juicy sweet filling, finished with a rustic, golden top.
Ingredients
Dough:
Filling:
Instructions
- Make dough in food processor, chill for 30 mins.
- Mix cherries with cornflour + sugar.
- Grate half the dough into pie dish, press gently into base.
- Pour in cherry filling evenly.
- Grate and scatter remaining dough on top — no pressing!
- Bake at 180°C (350°F) for 45–50 mins.
- Dust with icing sugar and let cool slightly before slicing.
Notes
- Freeze the dough for 10 mins before grating if it’s too soft.
- Preheat your baking tray to avoid a soggy bottom.
- Frozen cherries are fine — just drain them well.
- Goes brilliantly with vanilla ice cream or clotted cream.