
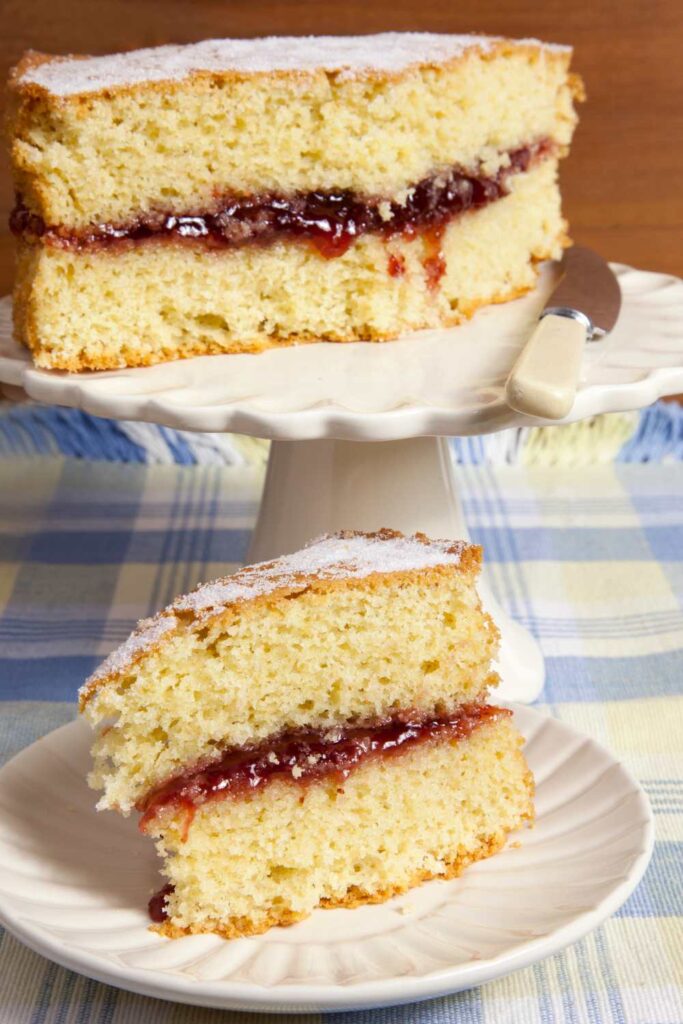
There’s something almost old-fashioned and honest about a fatless sponge. No fuss, no buttercream overload, no towering layers dripping in ganache. Just soft, airy cake — the sort that reminds me of rainy Sunday afternoons at my gran’s, when everything smelt faintly of PG Tips and sugar-dusted jam tarts.
Delia’s fatless sponge was the first cake I ever made that didn’t come out sunken or sad. I was sixteen, sulky, and convinced baking was a trap. But one bite of that golden, springy slice — sandwiched with homemade raspberry jam and just a whisper of cream — and I swear I heard angels singing. It’s a keeper, this one. Classic, easy, and light as a feather. Even smugly forgiving if you overbeat the eggs a bit (don’t, but still).
Why You’ll Love It
- No faffing with creaming butter — just chuck it all in and mix.
- Light as air — perfect after a heavy dinner when you still want dessert.
- Takes on any filling — jam, lemon curd, whipped cream, berries… sky’s the limit.
- Ready in under an hour — faster than most food deliveries, let’s be honest.
- Keeps beautifully for a few days (unless you eat it all first).
- Makes you feel like a proper British baker, even if it’s your first go.
Ingredients
- 115g self-raising flour
- 1 level teaspoon baking powder
- 115g spreadable butter
- 115g golden caster sugar
- 2 large eggs
- 1 teaspoon vanilla extract
To finish:
- Preserves, whipped cream, or lemon curd
- Icing sugar, for dusting
How to Make It
Grab two tins and preheat that oven:
Set your oven to 180°C (350°F), and line two 18cm sponge tins with parchment paper. Or butter them properly if you’re feeling retro. Either way, have them ready before the batter’s done.
Sift like you mean it:
Into a big mixing bowl, sift the flour and baking powder. Don’t skip this — it’s what gives the sponge that signature lightness. Trust me, I tried skipping once. Flat as a pancake.
Mix everything else in:
Add the butter, sugar, eggs, and vanilla extract straight into the bowl. Use an electric hand whisk and give it about a minute — until it’s pale, fluffy, and smooth. That’s it. Don’t keep going or you’ll lose the light texture we’re aiming for.
Divide and conquer:
Spoon the batter evenly between the two tins. Smooth the tops gently with the back of a spoon. You don’t need to be precious here — it levels out in the oven.
Bake until springy:
Pop the tins in the centre of the oven and bake for about 25 minutes. They’re done when the tops are golden and bounce back if you press them lightly. If in doubt, toothpick it — it should come out clean.
Cool (don’t rush it):
Let them rest in the tins for a few minutes, then loosen the edges with a palette knife. Flip them onto a wire rack and carefully peel off the parchment. Cool completely before sandwiching — warm cake will melt your filling into a puddle.
Assemble and finish:
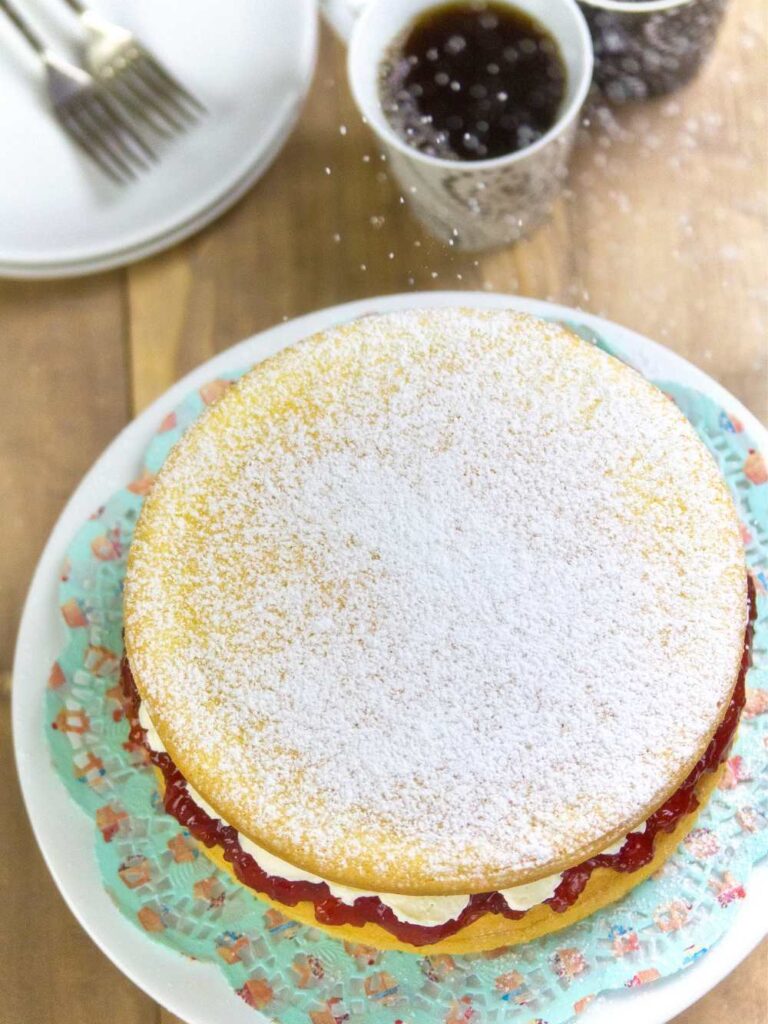
Spread one sponge with jam, lemon curd, or whipped cream — whatever you fancy. Plop the second sponge on top, and dust with icing sugar like it’s snowing. That’s it. Make a cup of tea and dig in.
Common Mistakes and How to Dodge Them
Why’s my sponge tough?
You probably overmixed the batter. Once it’s smooth, stop. The whisk is not a steering wheel.
Why didn’t it rise?
Old baking powder or cold eggs can sabotage your sponge. Make sure your ingredients are fresh and at room temperature.
Why did it stick to the tin?
Did you grease it well or use parchment? If not, that’s your culprit. Always line or butter generously.
Why’s it dry?
It baked too long. Ovens vary, so check at 22 minutes. The finger-spring test is your friend.
Storage and Reheating
Room temp:
If filled with jam or curd, keep it in a tin for up to 3 days. No fridge needed.
Fridge:
If there’s fresh cream involved, store it in a sealed container in the fridge — best eaten within 2 days.
Freezer:
You can freeze the sponges before filling. Wrap tightly and freeze up to 3 months. Thaw at room temp and fill fresh.
Reheating?
Honestly, you don’t. It’s best served at room temp, but if you must, 10 seconds in the microwave max.
Frequently Asked Questions
Is this really fatless if there’s butter?
Ah — classic question. “Fatless sponge” usually refers to the type made with eggs only for lift. Delia’s version has butter for softness, but still keeps that light texture. So yes… and no.
Can I make this gluten-free?
Yes, with a good 1:1 gluten-free self-raising flour blend. Results may vary slightly, but it works.
Can I double the recipe for a larger cake?
Totally — just use two 23cm tins and add 5–10 mins to the bake time. Keep an eye on the springy top.
Can I add fruit inside?
Sure. Thin-sliced strawberries or raspberries with cream are lovely. Just go light — too much and it’ll slip and slide.
Nutrition Facts (Per Serving):
- Calories: 134.6 kcal
- Fat: 15.7g
- Carbs: 134.6g
- Protein: 26.6g
- Sugar: 76.4g
- Sodium: 214mg
Try More Delia Smith Recipes:

Delia Smith Fatless Sponge
Description
Light, golden sponge sandwiched with your favourite filling — a classic teatime treat that’s as simple as it is lovely.
Ingredients
Instructions
- Preheat oven to 180°C (350°F). Grease and line two 18cm sponge tins.
- Sift flour and baking powder into a bowl.
- Add butter, sugar, eggs, and vanilla. Whisk until smooth.
- Divide between tins and smooth the tops.
- Bake for 25 mins until golden and springy.
- Cool completely on a wire rack.
- Sandwich with filling, dust with icing sugar, and serve.
Notes
- Use room temperature eggs for best volume.
- Don’t overmix once batter is smooth.
- Always let the cakes cool fully before filling.
- Can be frozen unfilled for up to 3 months.